Using a Custom Domain
By default, all images are served through the picperf.io domain. However, you’re able to change this to any domain you already own, whether it be to build more consistent branding, or to white-label PicPerf for clients.
Setting Up a Custom Domain
Section titled “Setting Up a Custom Domain”The process really straightforward: add a domain in the PicPerf admin and create a couple DNS records. Here’s a bit more detail:
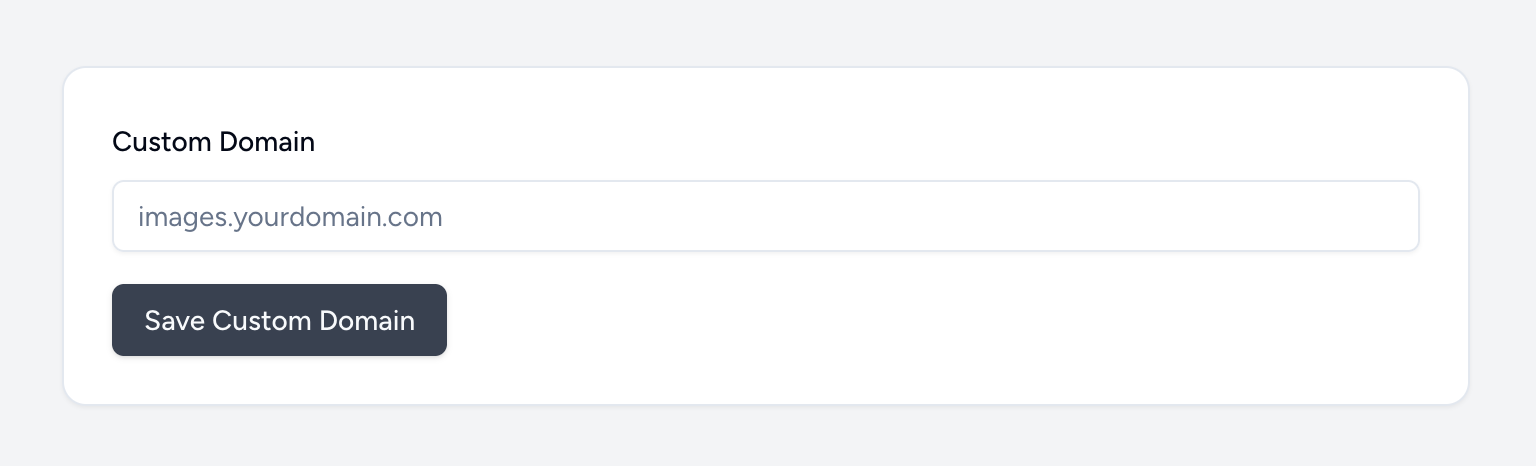
1. Log in into the PicPerf dashboard and click “Custom Domain” in the top navigation bar.
2. Enter the domain you’d like to use for your image URLs.
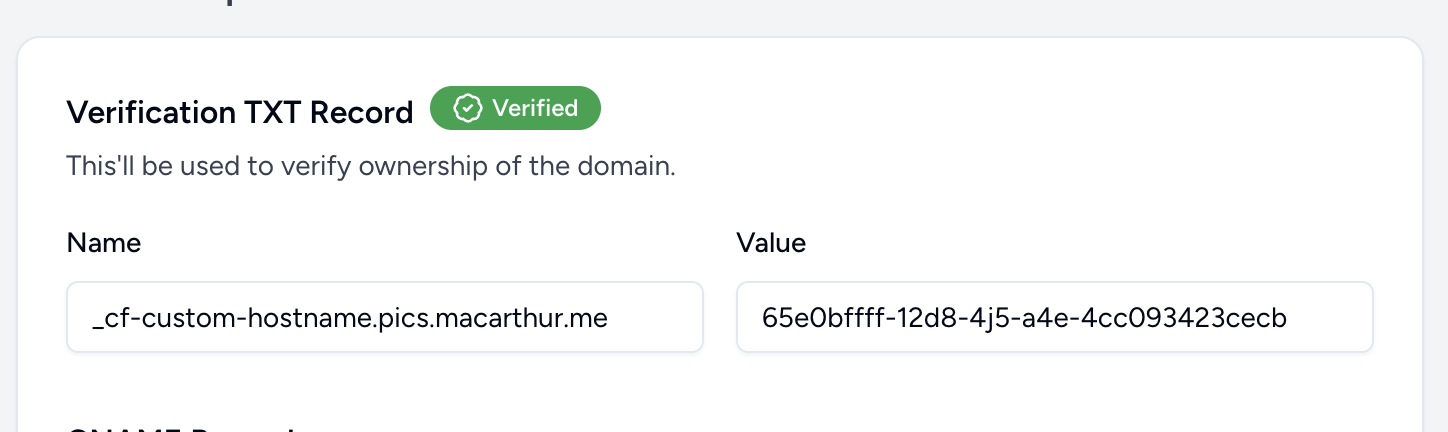
After submitting, you’ll see information for adding two DNS records to the domain you just used.
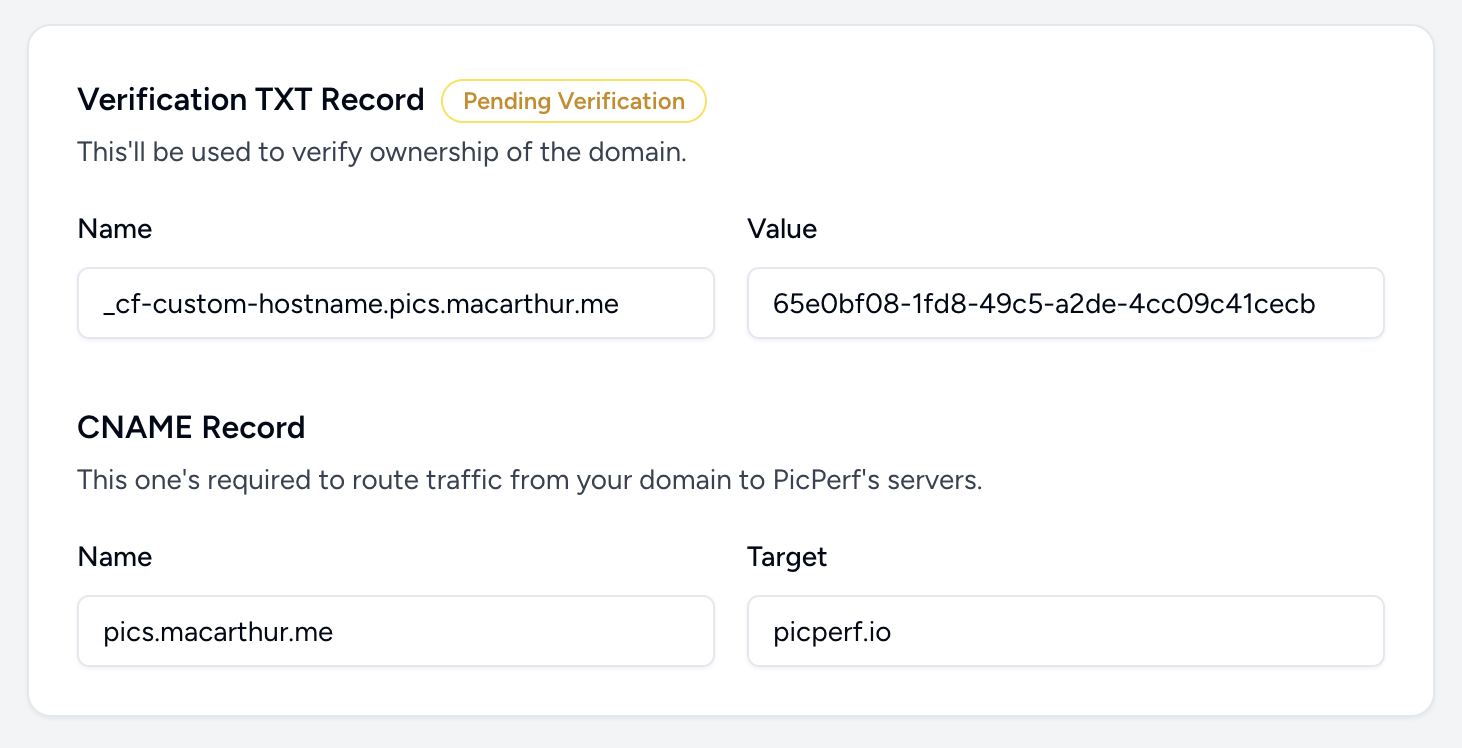
These records do the following:
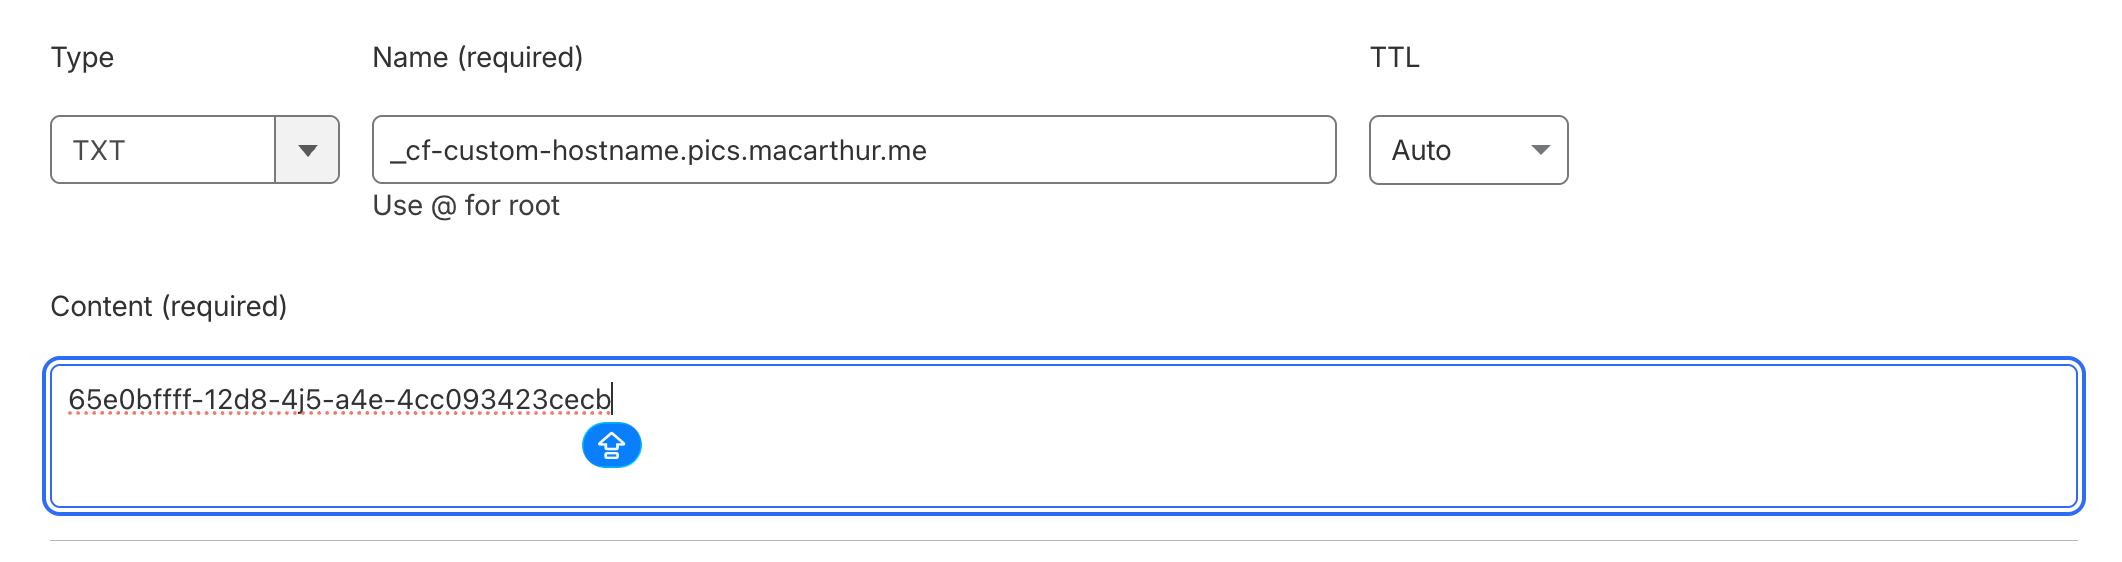
- The verification TXT record will verify the domain you’re attempting to set up.
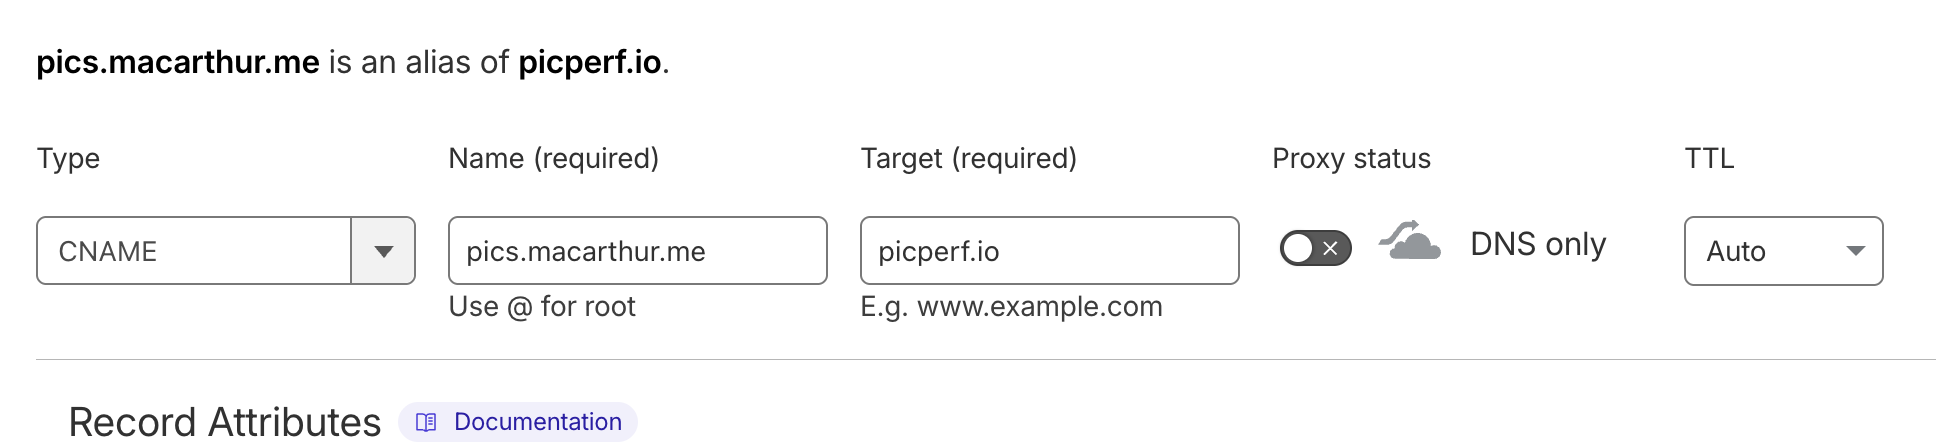
- The CNAME record will route all of your domain’s traffic to PicPerf.
3. Log into wherever your domain’s DNS records are hosted to add the aforementioned records.
4. Wait for verification to complete.
Once everything’s been successfully verified, you’ll see a badge in the PicPef admin:
Using Your Custom Domain
Section titled “Using Your Custom Domain”Using your domain is as simple as swapping out picperf.io for your domain in every image URL.
Before:
https://picperf.io/img/4CAF9H/rat.jpg
After:
https://pics.macarthur.me/img/4CAF9H/rat.jpg
And don’t worry about immediately changing over all links. The picperf.io version of those URLs will continue to function just fine.